Hi Boox Popular Magazine 2025
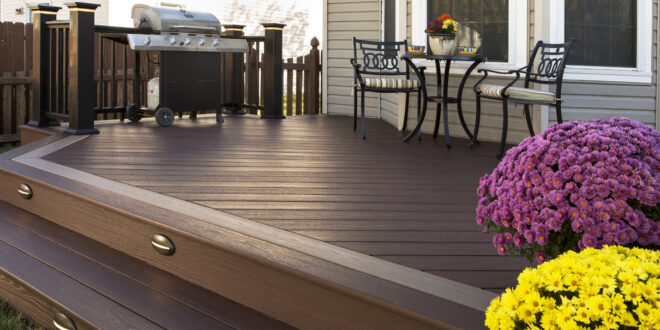
Repainting your deck can transform your outdoor space, providing a fresh look and added protection against the elements. This comprehensive guide, brimming with valuable insights, will walk you through the process from start to finish. Whether you’re a seasoned DIY enthusiast or a first-timer, these steps, coupled with insider tips, will ensure your deck looks its best for years to come.
Preparing Your Deck: Cleaning and Surface Inspection

The first step in repainting your deck is thorough preparation, which involves cleaning and inspecting the surface. Start by removing all furniture and debris. Use a deck cleaner to remove dirt, mildew, and old paint, ensuring the surface is clean and dry. Inspect the patio for any signs of damage, such as rot or loose boards, and make necessary repairs. Proper preparation is crucial for a long-lasting finish.
Selecting the Right Paint or Stain for Your Deck
Choosing the right paint or stain is pivotal in achieving a durable and appealing finish. For high-traffic areas, a high-quality deck paint offers durability and a wide range of colors. Stains, on the other hand, penetrate the wood, offering a more natural look while providing protection. Consider your deck’s material and your desired aesthetic outcome when selecting your finish.
Essential Tools and Materials You’ll Need
Before diving into the project, gather all necessary tools and materials. You’ll need a sander, paintbrushes or rollers, paint tray, primer, deck paint or stain, and safety equipment such as gloves and masks. If you’re working with a composite deck builder, they might recommend specific products tailored to composite materials. Opt for synthetic brushes for water-based paints and natural bristles for oil-based options. Having everything at hand streamlines the process, ensuring a smooth application.
Step 1: Surface Preparation – Sanding and Repairing

A smooth surface is key to a flawless finish. Begin with sanding the deck to remove any remaining old paint and to smooth out rough areas. Use a power sander or sandpaper, depending on the size of your deck and the work needed. Address any cracks, splinters, or uneven boards by repairing or replacing them. This step is essential for a professional-looking outcome.
Step 2: Applying Primer and Base Coat
Once your deck is smooth and repaired, apply a primer to ensure the paint adheres properly and lasts longer. Choose a primer suited for your deck’s material and the type of paint you’re using. After the primer dries, apply the first coat of paint or stain with a brush, roller, or sprayer, depending on your preference. Ensure even coverage for the best results.
Step 3: Precision Techniques for Painting or Staining

For a professional finish, adopt precision techniques during application. Use painter’s tape to protect areas you don’t want painted, such as siding or railings. When painting, work in small sections and maintain a wet edge to avoid lap marks. If staining, apply with the grain of the wood and wipe away excess stain to prevent pooling and uneven tones.
Final Touches and Maintenance Tips for a Long-lasting Finish
After the final coat dries, inspect your work for any touch-ups. Reattach hardware and move furniture back onto the deck, taking care not to damage the fresh paint. To maintain your deck’s appearance, clean it regularly and reapply a top coat every few years. This proactive approach will extend the life of your deck and keep it looking great.
Repainting your deck is a rewarding project that not only enhances the beauty of your outdoor space but also protects it from wear and tear. By following these steps and employing insider tips, you’ll achieve a stunning, durable finish. Remember, the key to a successful deck repaint is in the preparation and choosing the right products for your specific needs. Happy painting!