Hi Boox Popular Magazine 2025
If your attempt to assemble a projector is driving you mad, don’t give up yet! Even if you have no experience or have no idea where to start, conquering the task at hand is easier than you think.
With this guide, you’ll become a projection pro in no time and be able to show your friends your favorite movies right at home. Let’s jump right into the basics of mounting a projector and start your exciting journey!
Quick Breakdown
You can mount a projector by first identifying the mounting points on the back of the projector, and then attaching compatible brackets to those points and the ceiling. Be sure to make all necessary measurements before starting and follow safety instructions carefully.
Mounting a projector can be a daunting task for beginners, but the process is relatively simple if followed step-by-step. While there are many different ways to mount your projector, depending on personal preference and the type of projector you have, this guide will provide a general overview of the steps and procedures involved.
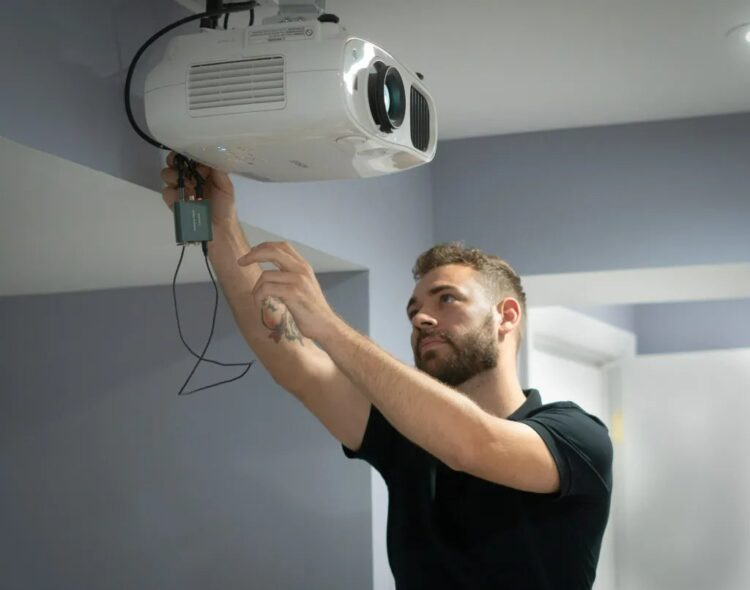
First, you’ll want to locate an ideal spot in the room to mount your projector, if you are unsure then check out the best projector for a living room. This should be a location that is central to your seating arrangement, as far away from windows and other light sources as possible. After choosing where you want your projector to be mounted, use a drill or screwdriver to secure any mounting hardware included with the projector (bolts, screws, etc.) in the ceiling or other surface you plan on placing it.
Second, attach mounting arms or rods to the newly secured hardware to adjust and level the projector into position. Depending on the arm length and weight of the projector, you may also wish to consider any additional support/bracing required such as a wall mount plate. This is important in preventing any potential stress placed on the hardware by extreme angles of adjustment.
Third, once all pieces of hardware have been assembled and secured firmly in place, extend your mount arms or rods until they reach their maximum length, carefully positioning your projector so as not to cause any damage or disturbance.
Through these steps, you’ll be able to establish a snug hold without having to worry about movement over time. Finally, connect all necessary power and video cables—and voila! Your new projector is now firmly mounted and securely in place for viewing pleasure!
Mounting a projector doesn’t need to be difficult or complicated—in fact, it can become quite simple if done properly. Careful consideration must be given throughout each step to ensure safety and stability as well as avoid potential damage from loose/unsecured parts due to mishandling. With that said, however, installing a projector yourself can also prove mystifying for inexperienced users if not completed correctly.
Consulting qualified technicians before attempting installation is highly recommended for those with limited knowledge on how to effectively mount a projector in order to ensure satisfaction with their results.
Now that the project has been successfully mounted, the following section will provide tips and advice on the proper positioning of your new digital display and help ensure optimal picture quality at all times!
Positioning the Projector
Now that you have placed the projector, it is time to get it in the optimal position. Depending on your situation, you may need to adjust it slightly forward or backward and at an angle; this will depend on the size of your projection space, the height of the ceiling, and other factors.
For a traditional setup, be sure to place the projector lens approximately the same distance away from the screen as it is wide. This will prevent distortion and ensure that your image is in proper proportion. Additionally, when positioning the device, use a level tool or phone app if necessary to ensure that it is mounted straight. A crooked image will not only look unattractive and unprofessional but can also cause eye fatigue over time.
If you are mounting to a wall rather than a floor-to-ceiling ceiling mount, you should use a company-supplied swivel bracket to adjust the projector up or down. This can help ensure that your picture remains crisp and without distortion when projected onto an angled or curved surface.
Once you have positioned and secured the projector securely in place using a few well-placed screws, move on to securing the mount itself. The next section will explain how to do this safely and accurately so that your projector won’t come loose after some use.
- According to the Consumer Technology Association, sales of digital projectors in the US alone were valued at around 2.5 billion US dollars in 2019.
- A 2017 survey administered by Optoma found that 58% of businesses used projector technology for meetings or presentations.
- According to a 2016 survey by ProjectorCentral, more than half (56%) of all respondents had purchased more than one projector within the past five years.
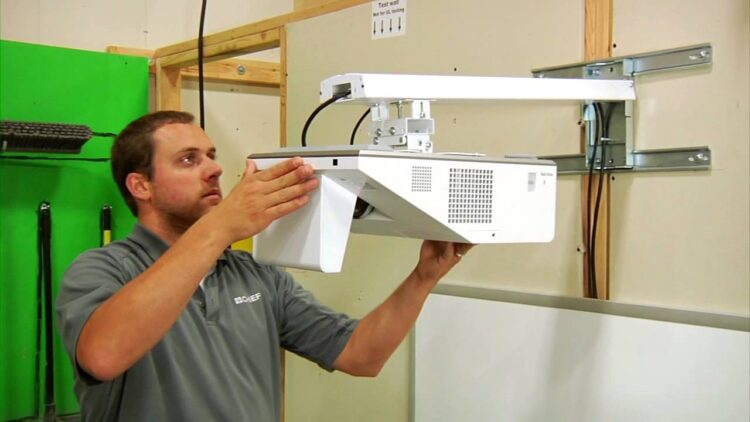
Securing the Mount
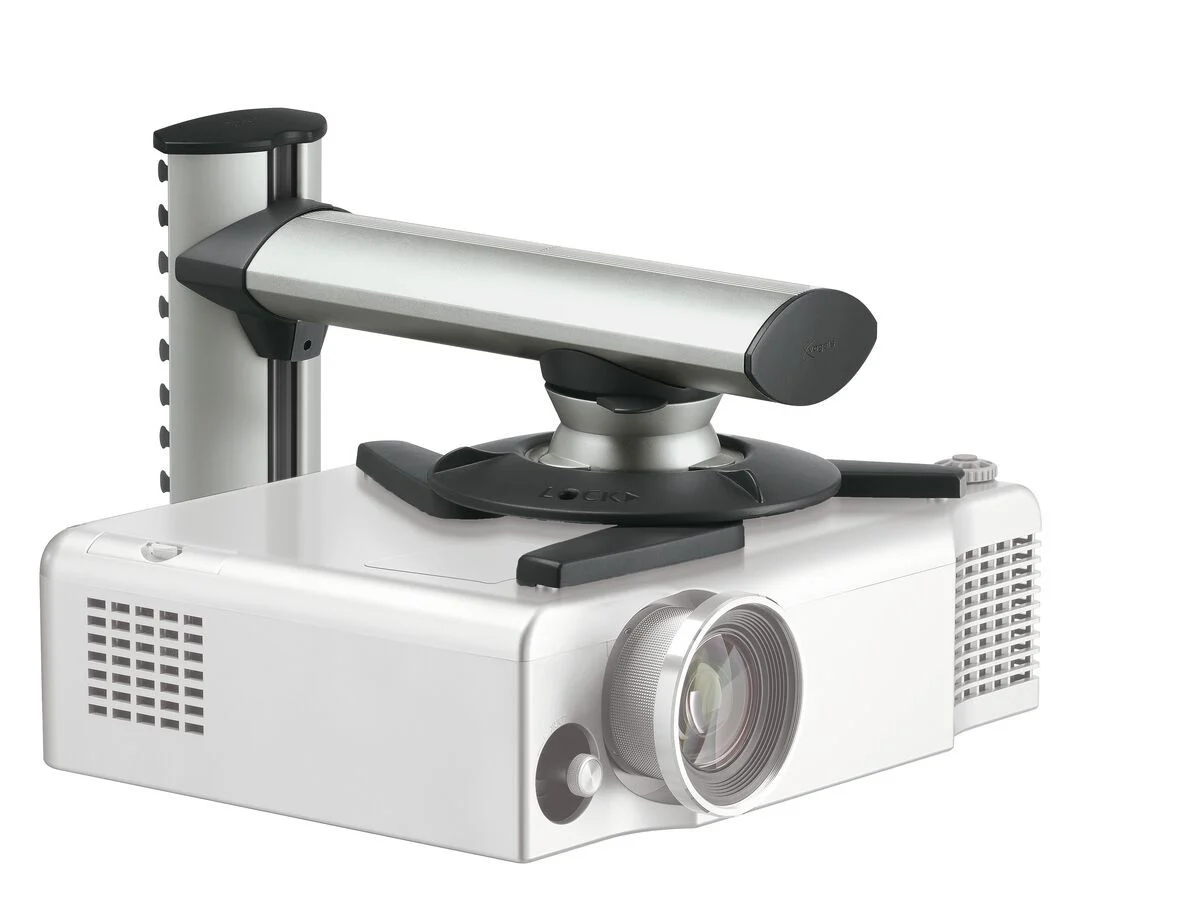
To safely mount a projector, it is important to secure a strong, solid mount. The projector must be securely fastened in place to ensure that it stays where it has been mounted and does not sway or move. Many mounts come with screws and bolts that should be used when mounting.
Additionally, it is important that the mounting surface can support the weight of the projector, and if there are any doubts, a stud finder may be used to detect which areas are safe for support.
When selecting screws to use for mounting, several factors must be considered. It is important to select screws of the correct length for safety; if the screws are too short, then the projector may not be held securely in place, or may not be mounted correctly at all. On the other hand, if the screws are too long and penetrate too deeply into the wall or ceiling, damage could occur or electrical wiring could become affected.
Debates over whether stainless steel or zinc-coated screws are optimal for projector mounting vary depending on who is doing the installation and their particular preferences. Stainless steel screws generally cost more than zinc-coated ones but they last much longer since they do not corrode as easily due to moisture buildup around them.
On the other hand, some people prefer using zinc-coated screws because they drive into drywall more easily. Ultimately, either type of screw is an appropriate choice for securely mounting a projector – whichever option you choose should depend on your budget and preferences.
Once all of the components have been secured properly and the mount is in place ready to hold the projector in position, you can move on to connecting power by following directions specific to your model of projector.
Top Summary Points
To safely mount a projector, it is important to secure a strong, solid mount and use screws of the appropriate length. Both stainless steel and zinc-coated screws are appropriate choices depending on budget and preferences, with stainless steel costing more but lasting longer due to less corrosion.
Finally, follow instructions specific to the model of the projector to connect power and complete mounting.
Connecting Power
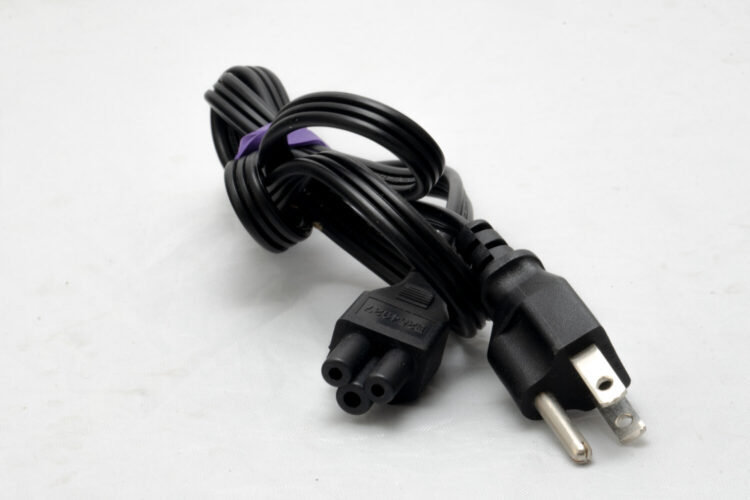
After unboxing the projector and setting it up, the next step to take is to connect power. Power cords are required or the projector will not be able to turn on. There are generally two types of power cords, AC Power Cord (for 220V/50HZ), and DC Power Cord (for 100V/240V). Choose the power cord that works for your region, and then plug it into both the wall socket and the projector.
When using an AC Power Cord, you must also make sure to use a compatible voltage converter if needed. The risk of using a voltage converter without proper instructions is high, so it is always advisable to consult a technician if unsure. It is best to take caution when connecting power to avoid any electrical shock or damage.
On the other hand, DC Power Cords operate at lower voltages than AC Power Cords which makes them safer to use. They can be plugged directly into wall outlets with no need for additional voltage converters. Ensure that your wall socket matches the type of plug used by the DC power cord before connection.
Once both sides of the power cord have been connected securely, you will know if your connection was successful once it is powered up.
The final step before continuing to adjust and visualize the projection is ensuring the proper connection of power to guarantee a successful mount from beginning to end. With that being said, our next section of this guide will discuss final adjustments and visualization techniques in completing your setup for home movie night!
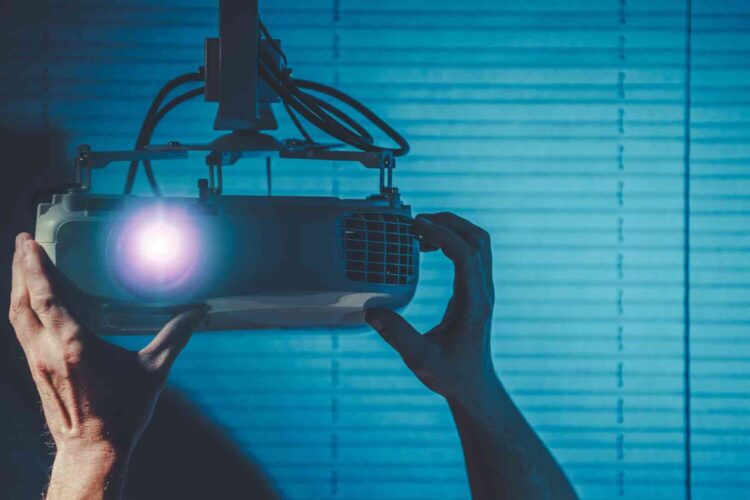
Final Adjustments and Visualization
Once the projector is installed and all cords are connected, it is time to make final adjustments and visualization. Before adjusting the projector’s position and settings, it is important to remove any obstacles that might be blocking or interfering with the projector’s beam.
Depending on the setup, this will likely involve moving furniture such as couches, chairs, or tables away from the wall or screen that the projector is projecting onto.
In terms of adjusting the projector settings, it is recommended to start by fine-tuning the focus of the image first. Beginners may find this difficult due to a lack of experience in handling projectors.
Adjusting focus requires patience as a slight shift could easily lead to a blurry image. If having trouble figuring out how to adjust focus precisely, try using other devices such as binoculars or magnifying glasses for precise viewing.
Doing so will pinpoint exactly where to aim with accuracy and speed. Once focus is properly adjusted, tweak other settings such as brightness levels, contrast ratios, and others until an optimal level is achieved.
When testing out different projection angles to their size and shape, special attention needs to be paid to getting the aspect ratio correct. This ensures images remain in their intended form without distortion or stretching, which can impair viewing quality.
After setting all these parameters and achieving a desirable result regarding aspect ratio and visual clarity, only then should one move on to decide whether a wall mount or ceiling mount would be most suitable based on preferences.
With final adjustments made and visualization optimized through dedicating time to applying proper techniques as discussed above, now we can proceed to discuss the advantages and disadvantages of wall mount versus ceiling mount in the following section.
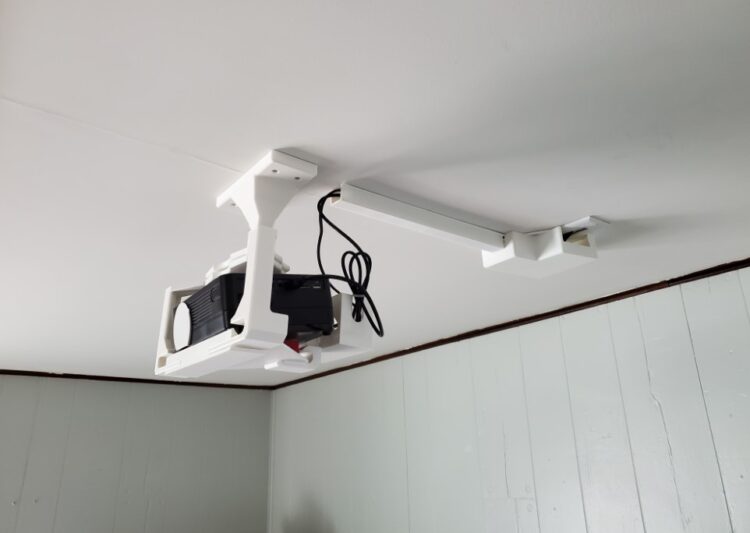
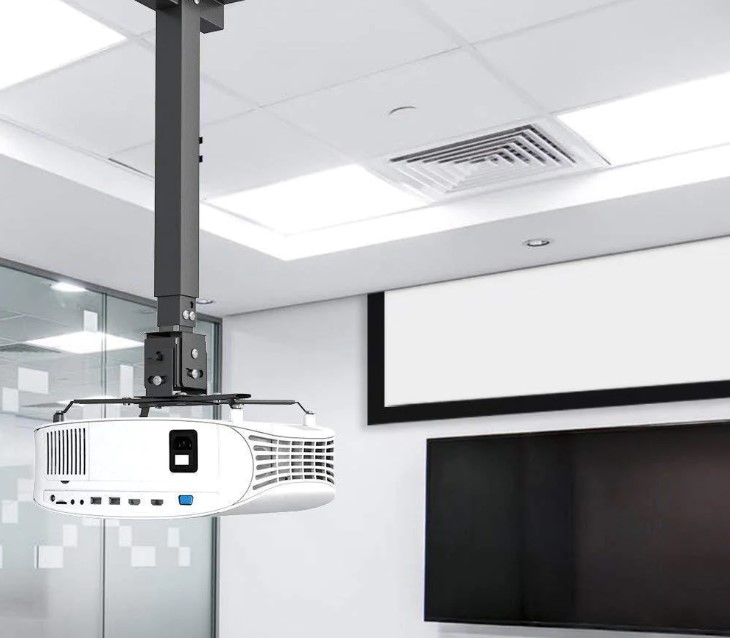
Wall Mount or Ceiling Mount?
When deciding to mount a projector, one must determine if the projector should be mounted to the wall or the ceiling. The decision between the two largely depends on the space available and the intended use for the projector.
Wall mounting allows for easy access to the projector by simply connecting it directly to power and data sources that are nearby. However, most people choose wall mounts due to aesthetics because they are easier to hide.
Mounting a projector on a wall also makes it easier to adjust its orientation, unlike ceiling mount where some models may be limited in their ability to be pivoted. Additionally, wall mounts often provide more stability than ceiling mounts.
Ceiling mounting provides improved image quality when compared to wall mounting as there is less interference caused by nearby objects that can produce distortions or block light output.
Ceiling mounts can be installed more flush against the ceiling than wall mounts which contributes towards both better image quality and aesthetics.
Most importantly, having a projector mounted from the ceiling creates a less cluttered environment due to not having cords and wires showing along with requiring fewer peripheral hardware pieces as fewer connections need to be made.
Both wall and ceiling mounting have their advantages and disadvantages depending on what type of setup works best for you. After considering all of these factors, decide what works best for your situation and move forward with purchasing the necessary materials.
Now that you know whether you should get a wall or ceiling mount for your projector, it’s time to think about what size of the mount will best fit your needs for optimal performance – this is discussed in further detail in the next section.
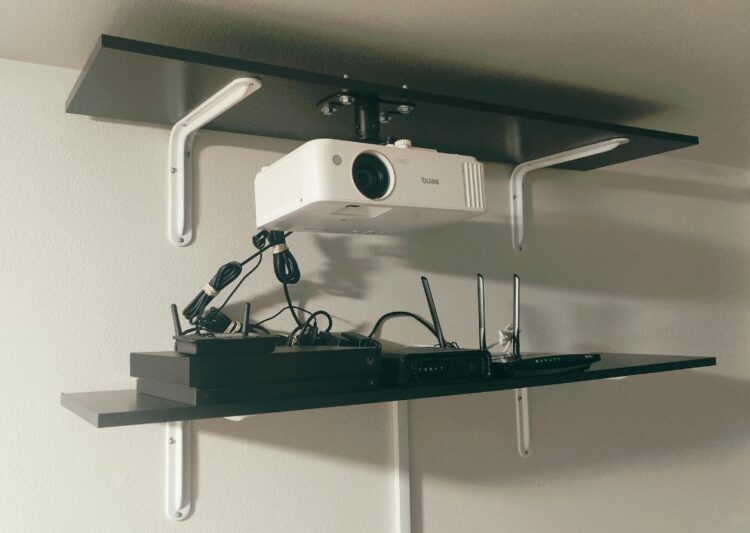
What Size Mount to Get?
When you’re installing a projector, your mount is just as important as the projector itself. It’s the piece that holds your projector in place and helps ensure a secure installation. But when it comes to selecting the right mount size for your particular projector and situation, there are many factors to consider.
The most important factor is determining whether or not you have adequate space for the mount itself. You’ll need enough space above and below the mounting point to accommodate both the projection screen and the mount.
If space is limited, you may need to go with a smaller size mount or make other arrangements such as ceiling mounts or wall-mounted racks.
You’ll also need to consider if you want the projector to be adjustable at all.
Fixed mounts don’t offer much flexibility in terms of setup and positioning, but they can save space and provide stability in smaller setups. Rotating mounts provide more range of movement but may require more space.
No matter what kind of mount you choose, it should also be compatible with both your projector model and its weight rating. To ensure compatibility, always reference your user manual or check with your local dealership or authorized installer before making any purchase decisions.
Now that you know what size mount is best for your situation, let’s move on to the next step – tips on making the installation secure.
Tips on Making the Install Secure
Making the installation secure is essential for a successful projector mount. To ensure safety, it is important to use screws and anchors that are capable of holding the weight of your projector. If your projector is being mounted to a drywall or other thin wall material, make sure you use anchors designed for the surface. Space the screws evenly along the wall plate to disperse the weight of the projector and help prevent any damage to your wall. You may also want to consider using a lock or security cable to secure your projector, if possible.
If you are mounting to a ceiling, use special hooks or fixtures designed specifically for use with heavy electronics and ensure they’re tight enough that they will not come loose over time. Check all hardware regularly to make sure it remains tight and securely mounted.
When adding extra weight with equipment such as speakers, always be sure to check that your mount can handle the load; otherwise, you risk damaging both your equipment and the wall! Ensure all wiring is routed away from pinch points or areas of excessive movement (such as door hinges) so there’s no risk of it becoming damaged over time.
With these tips in mind, you’ll be ready to tackle any task when mounting your projector and keep it secure long-term. Now, let’s move on to our conclusion and overall review of mounting a projector.
Conclusion and Overall Review of Mounting a Projector
Overall, mounting a projector can be a tricky but rewarding endeavor. With the right set of tools, knowledge, and patience, anyone can expertly mount their projector. To guide individuals through the process, this article has provided a step-by-step guide for beginners to reference for help. It also detailed some of the most important aspects to consider before beginning the installation, such as the size of the projector and mounting accessories like wall brackets.
Additionally, viewers were reminded that since it can be complicated to mount a projector alone, it is never a bad idea to reach out for additional help from an expert if necessary.
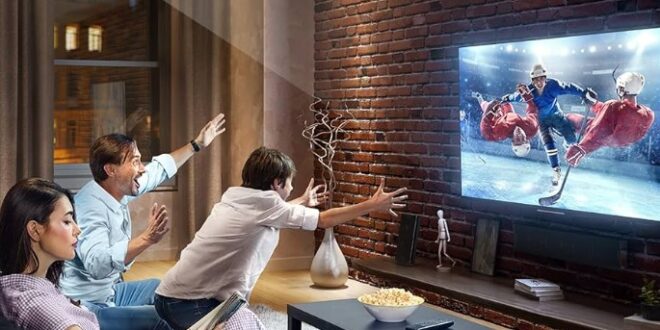
With its numerous benefits, such as better visuals and increased safety, it’s no wonder so many people are opting for their projector mounts. While some may argue that projected images do not look as clear as when projectors are placed on tables or hanging from ceilings, it is still ranked among one of the best ways to enjoy projected video images in any given space.
Other avid fans may also debate that traditional installation methods take more time and cost more money due to the added labor expenses; however, with careful research into which mounting option works best with one’s budget and lifestyle requirement, projections fans need not worry about exceeding what they have planned to spend.
Once properly mounted and positioned, projectors provide an incredible viewing experience with balanced audio levels that bring movies and TV shows alive right in your living room or office environment. Whether attempting to mount a projector for the first time or seeking assistance from an established professional service provider, ensure you read all included manual instructions carefully before attempting anything yourself.
To sum things up: if someone takes their time planning ahead of time and makes sure all needed components are in hand before beginning the installation process -mounting a projector should be relatively easy-peasy!
Answers to Common Questions
What tools and materials are required for mounting a projector?
Mounting a projector requires a few basic tools and materials depending on the mounting system you choose. If you plan to mount your projector on the ceiling, you’ll need a level, an electric drill with an appropriate drill bit, appropriate screws and anchors for the type of wall your ceiling is made out of, and mounting brackets compatible with your chosen projector model.
It’s also useful to have some protective padding between the projector and the wall/ceiling so that it doesn’t get scratched.
If you plan to set your projector on a surface instead of mounting it to the ceiling, you’ll need either a heavy-duty tripod or stand that can support the weight of your projector, as well as any cable management accessories as needed.
It’s important to read through the instructions for setting up your particular projector model and determine exactly which tools and materials are required, as different models of projectors will require different setups.
What types of mounting options are available for a projector?
When considering mounting options for a projector, there are several solutions available. The most common mounting solution is ceiling mounting, where the projector is installed directly to the ceiling of your room or space.
This option typically gives the best image quality and the least amount of distortion. However, this option may not be practical or possible in certain spaces, particularly those with low ceilings or other obstructions.
In this case, wall mounting can be used as an alternate option. Wall mounting allows the projector to be installed onto any suitable wall surface, usually at a height of approximately 22” – 24” above the floor level. This option requires additional hardware and components to properly secure the projector, such as brackets and mounting arms.
Finally, shelf or table mounting can also be considered as another viable option. This involves placing the projector onto an existing shelf, tabletop, or credenza surface.
Many projectors come with a built-in base that is designed specifically for this application. Shelf/table mount options are great when wall and ceiling options are not possible due to limited space or ceiling height restrictions.
What safety precautions should I take when mounting a projector?
When mounting a projector, safety should be your top priority. No matter how big or small the project may seem, there are important guidelines to consider that will ensure a safe and successful installation.
The most important safety precaution to remember is to always use a step ladder when working at heights. Not only does this allow you to work more safely, but it also prevents potential injury from falls.
Additionally, secure the projector before beginning any wiring projects, as this will prevent potential accidents resulting from accidental movement of the device when you’re not expecting it.
It’s also important to be aware of your power cords and other wiring components, as these can present potential tripping hazards when not properly secured. Make sure that all cords are tucked away and out of sight, and take care to keep them away from any heat sources that could cause them to overheat.
Finally, make sure you have the right tools on hand before beginning any electrical work. Protective eyewear is always recommended when using drills or saws, and protective gloves should be worn when working with power tools. Doing so will help protect against any flying debris or electric shock. Following these guidelines can ensure your safety when mounting a projector.