Hi Boox Popular Magazine 2025
Today’s testing is more than just a stage in the software development life cycle—it’s a continuous endeavor that ensures the stability, performance, and reliability of your application. Jest, a powerful JavaScript testing framework, is commonly used to test React applications and other JavaScript libraries.
But what happens when you need to integrate browser-based automation tests in your CI/CD pipeline?
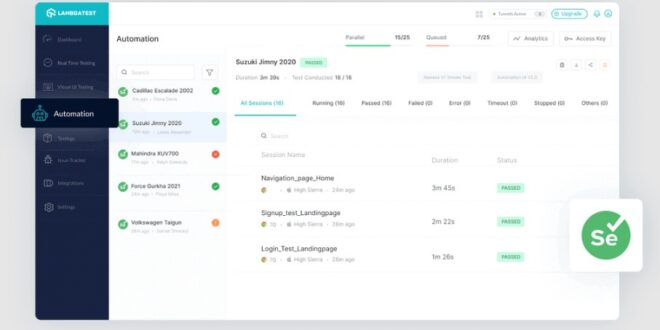
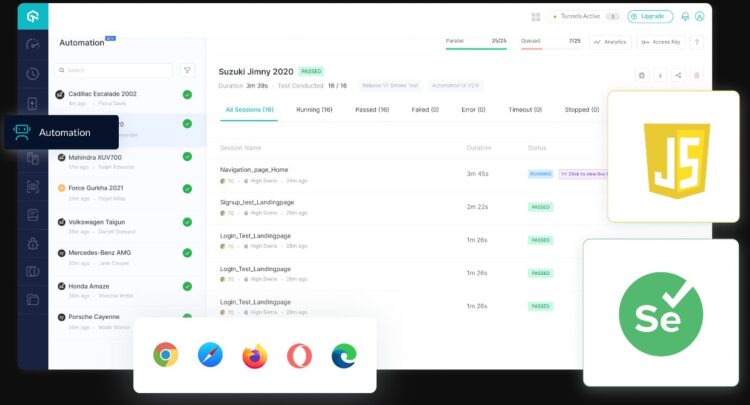
That’s where Selenium, an eminent automation testing tool, comes into the picture. But why stop there? When combined with LambdaTest, a cloud-based cross-browser testing platform, you’re empowered to run your Jest and Selenium scripts on over 3000 browsers, devices, and operating systems, all without the hassle of maintaining an in-house device lab. So, try considering this cloud approach, too, for more scalable and swift testing.
Armed with this potent knowledge, let’s now delve into the process of effortlessly combining Jest and Selenium to create a thorough and automated testing approach. By the end, you’ll have the full knowledge to run your Jest tests with Selenium. So, let’s dive in!
Reasons To Use Jest With Selenium
Here are key advantages that make Jest an excellent option for testing in conjunction with Selenium:
Jest Offers TypeScript Compatibility
A standout benefit of Jest is its full-fledged support for TypeScript, which is particularly useful for developers building JavaScript applications for both server and client environments using TypeScript. As an enhanced version of JavaScript, TypeScript introduces elements like static types, interfaces, and classes, which facilitate code writing and maintenance. Jest enables TypeScript support through the ts-jest package. This package serves as a TypeScript preprocessor and includes source map support, simplifying the task of writing and running TypeScript-based tests in Jest.
Another major plus of ts-jest is its active and responsive community. The package receives consistent updates and feature additions, and any reported issues are quickly addressed, making it a dependable choice for developers.
Jest Is Easy To Install And Use
Another compelling reason to choose Jest is its hassle-free setup process. Installation is straightforward on any system; you just need the package manager, be it “npm” or “yarn,” to download Jest. For even more convenience, you can install Jest globally by using the “-g” flag during the npm installation. This removes the need to configure package files for various npm tests, allowing you to run Jest commands directly. In addition, Jest comes equipped with a variety of user-friendly modules, eliminating the need for intricate configurations and allowing you to start writing tests right away.
Jest ─ An All-Inclusive Testing Framework
Jest serves as an all-encompassing solution for your various testing requirements. It offers built-in matchers, spying capabilities, and a comprehensive library for mocking, making it a full-featured testing platform. Although initially modeled after Jasmine and incorporating many of Jasmine’s strengths, Jest has significantly evolved in recent versions to include its own enhancements, thereby increasing its capabilities. When compared to custom testing solutions like those based on Mocha, Jest excels in user-friendliness.
Designed with a focus on simplicity, Jest offers built-in tools and features that streamline the process of writing and running tests. Developers can thus avoid the complications of intricate configurations or the need for installing supplementary libraries. All the essential elements for effective testing are integrated into Jest, making it the go-to option for developers seeking a robust yet easy-to-use testing solution with minimal setup requirements.
Steps To Run Your Jest Automation Testing Scripts With Selenium
Running Jest automation testing scripts with Selenium allows you to conduct efficient and reliable browser testing for your web applications. Hence, in this section, we’ll outline the steps to set up and run your Jest automation testing scripts with Selenium.
Step 1 ─ Project Setup
Before diving into the specifics of running your Jest scripts with Selenium, ensure that you have the necessary tools installed and your project structure is organized. You’ll need Node.js, npm (Node Package Manager), and your project directory in place.
Step 2 ─ Install Dependencies
In your project directory, open a terminal and install the required packages. Install Jest, Selenium WebDriver, and a browser driver (e.g., ChromeDriver) using the following commands:
“`bash
npm install jest @jest/globals selenium-webdriver chromedriver
“`
Step 3 ─ Configure Jest
Create a Jest configuration file in your project directory. You can name it `jest.config.js`. Now configure Jest to recognize your test files and use appropriate presets. Here’s a basic example:
“`javascript
module.exports = {
testMatch: [“<rootDir>/tests/**/*.test.js”],
testEnvironment: “node”, // Use “jsdom” if your tests require a browser-like environment
};
“`
Step 4 ─ Write Your Jest Test

Create a directory named `tests` in your project to store your test files. In this directory, create a test file (e.g., `sample.test.js`). Write your Jest test using Selenium WebDriver to interact with the browser. Here’s a simple example:
“`javascript
const { Builder, By, Key, until } = require(“selenium-webdriver”);
describe(“Sample Test Suite”, () => {
let driver;
beforeAll(async () => {
driver = await new Builder().forBrowser(“chrome”).build();
});
afterAll(async () => {
await driver.quit();
});
test(“Title should be ‘Example Domain'”, async () => {
await driver.get(“http://example.com”);
const title = await driver.getTitle();
expect(title).toBe(“Example Domain”);
});
});
“`
Step 5 ─ Run Your Tests
In your terminal, run the Jest tests:
“`bash
npx jest
“`
Jest will discover your test files based on the configuration and execute them. The Selenium WebDriver will open a Chrome browser instance and perform the defined actions.
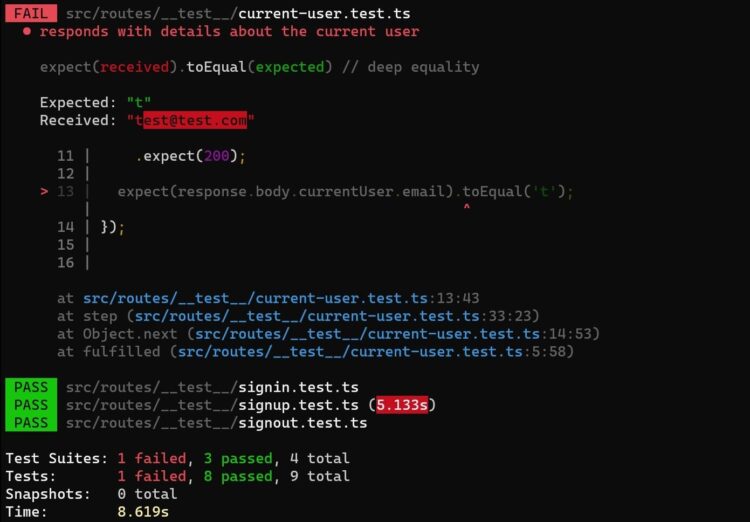
Step 6 ─Review Results
After the tests run, Jest will display the test results in the terminal. You’ll see information about passed and failed tests, as well as any error messages. If a test fails, Jest will provide details about the failure, helping you diagnose the issue.
Step 7 ─ Advanced Configurations
To elevate your testing process to the next level, consider implementing the following advanced configurations:
Test Matches
Jest offers a wide range of built-in matchers that allow you to create expressive and readable assertions. These matchers are used within the `expect()` statements and help you validate various conditions in your tests. Some common matchers include:
– `toBe()`: Compares strict equality (===) of values.
– `toEqual()`: Deeply compares the properties and values of objects.
– `toMatch()`: Matches strings against regular expressions.
– `toContain()`: Checks if an array or iterable contains a certain element.
– `toThrow()`: Checks if a function throws an error.
Leveraging these matchers enhances the clarity and precision of your test assertions, making your test cases more descriptive and effective.
Asynchronous Testing
In modern web applications, many operations involve asynchronous behavior, such as network requests and timers. To handle these scenarios, use `async/await` syntax or Jest’s built-in asynchronous utilities like `waitFor` and `waitForElementToBeRemoved`. For example:
“`javascript
test(‘Async operation test’, async () => {
const result = await fetchData(); // Assuming fetchData() returns a promise
expect(result).toEqual(expectedValue);
});
“`
Mocking
Mocking is a technique that allows you to isolate specific modules or functions during testing, preventing unintended side effects and making it easier to focus on the behavior of the unit being tested. Jest provides powerful mocking capabilities through functions like `jest.mock()` and `jest.fn()`. Mocking can be particularly useful when testing components that rely on external APIs or services.
“`javascript
// Mocking a module
jest.mock(‘./myModule’);
const myModule = require(‘./myModule’);
myModule.myFunction.mockReturnValue(expectedValue);
// Now, myFunction will return expectedValue during testing.
“`
Parallel Execution
As your test suite grows, the time it takes to run all tests can become a bottleneck in your development process. Jest supports parallel test execution to significantly reduce the overall test suite execution time. To configure parallel execution, you can use the `maxConcurrency` option in your Jest configuration:
“`javascript
// jest.config.js
module.exports = {
// Other configurations…
maxConcurrency: 5, // Maximum number of parallel test workers
};
“`
By utilizing parallel execution, you can take full advantage of multi-core processors and complete your test suite much faster.
Best Practices To Run Jest Automation Testing Scripts With Selenium

Here are some best practices for running your Jest automation testing scripts with Selenium:
- Use WebDriver Manager ─ To automatically manage the browser driver versions, you can use WebDriver Manager. This ensures you always have the latest compatible version of the driver.
- Jest global setup ─ Jest allows you to have a global setup and teardown modules, which can be particularly useful for setting up Selenium WebDriver.
- Environment isolation ─ Make sure to isolate your test environment from your development and production environments.
- Descriptive test names ─ Use clear, descriptive test names to indicate what each test is supposed to do.
- Code reusability ─ Common code snippets like logging in, navigating to a page, etc., can be refactored into helper functions to promote reusability and maintainability.
- Async/Await ─ Since both Jest and Selenium WebDriver’s JavaScript bindings support promises, use async/await to make your tests easier to read and write.
- Separate concerns ─ Separate your tests into different suites to categorize them by what they are testing (UI components, integrations, etc.).
- Page object mode ─ Consider using the Page Object Model to structure your Selenium code. This design pattern helps in maintaining the code and reduces code duplication.
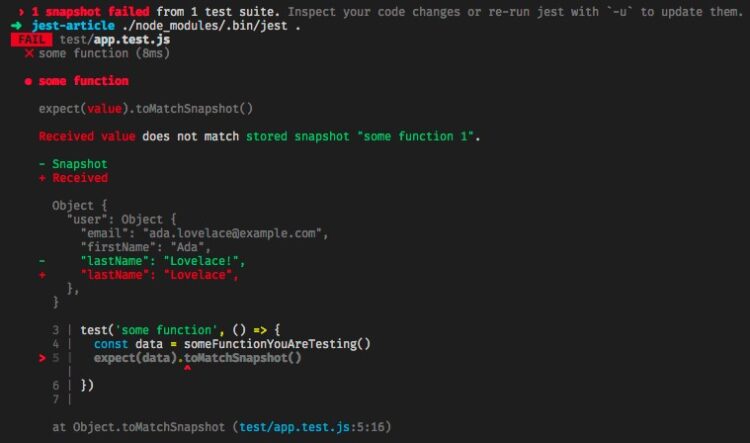
- Snapshot testing ─ For UI components, use Jest’s snapshot testing feature to ensure your UI does not change unexpectedly.
- Concurrency ─ Jest provides options to run tests in parallel, which can significantly speed up the test execution time. However, be mindful of race conditions.
- Test selectors ─ Use data-test selectors to find elements instead of relying on CSS selectors, which might change over time and break your tests.
- Timeouts ─ Properly set timeouts for Jest and Selenium to ensure that tests do not hang indefinitely.
- Retries ─ Implement retries for flaky tests but aim to make them stable.
- Isolation ─ Run tests in isolated browser sessions to prevent a shared state between tests.
- Headless mode ─ Running Selenium in headless mode can speed up test execution time.
- Dockerization ─ Consider containerizing your Selenium grid and Jest environment using Docker for easier CI/CD integration.
- Reporting ─ Use tools like Allure or Jest’s own reporting options to generate test reports.
- Version control ─ Keep your tests in the same repository as your application code, if possible, to version them together.
- Pipeline steps ─ In your CI/CD pipeline, separate steps for unit tests, integration tests, and UI tests and run them based on their dependencies and the stage of the pipeline.
- Regular updates ─ Regularly update your Selenium WebDriver, Browser Drivers, and Jest to the latest stable versions.
- Code reviews ─ Like application code, test code should also undergo code reviews to ensure quality and maintainability.
- Documentation ─ Comment on your code and maintain documentation about your testing strategy and setup.
Conclusion
By combining Jest’s powerful testing utilities with Selenium’s robust browser automation features, you can create comprehensive and reliable tests for web applications. But remember to set up the necessary dependencies, configure your test environment, and structure your test suites effectively.
This integration allows you to achieve faster feedback on your web application’s functionality and catch potential issues early in the development process. In fact, embracing this approach will contribute to delivering a more polished and error-free user experience, ultimately leading to higher software quality and increased user satisfaction. Happy testing!