Hi Boox Popular Magazine 2025
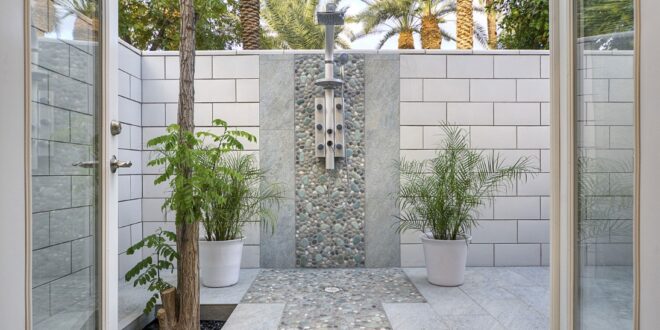
Transforming an exterior wall with pebble tiles can elevate your home’s exterior to an artful display of natural beauty and sophisticated design. This unique wall treatment infuses depth, texture, and an organic touch into your outdoor space, making it stand out.
Although the task may appear complex, armed with expert advice and a clear guide, you can achieve a remarkable and enduring finish. Let’s dive into the step-by-step journey of affixing pebble tiles to an exterior wall.
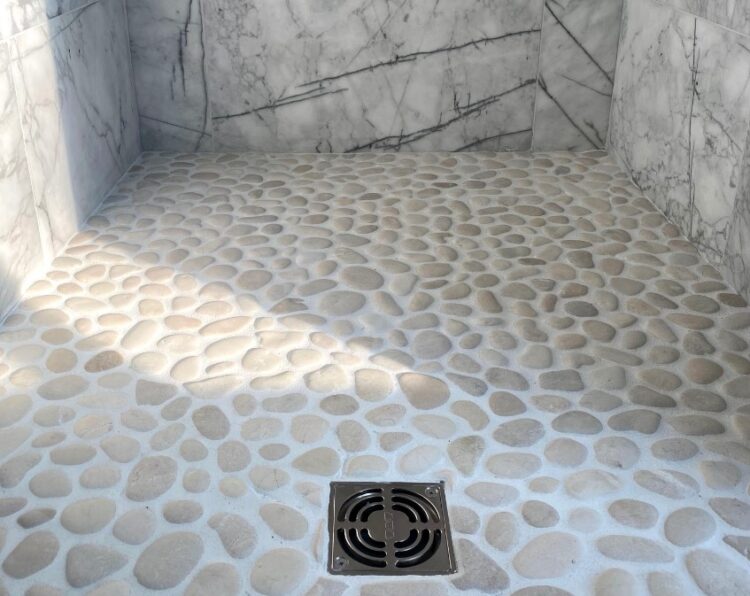
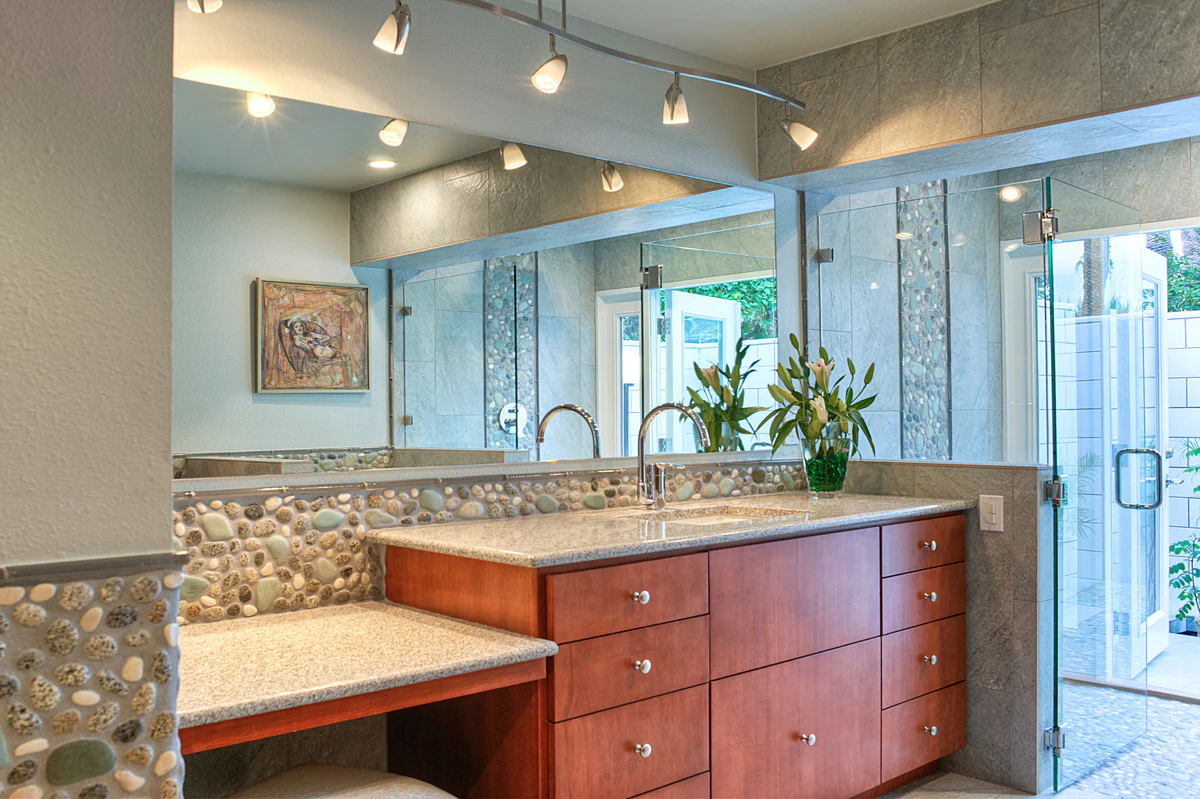
Getting to Know Pebble Tiles
Pebble tiles consist of small, naturally rounded pebbles affixed to a flexible mesh backing, allowing for easy installation over various surfaces. Available in a spectrum of colors and sizes, these tiles offer endless design possibilities, enabling you to customize your space to match any architectural style, from rustic charm to contemporary sleekness.
The innate beauty of these tiles lies in their ability to merge the outdoor landscape with your home’s architectural features.
Wall Preparation is Key
The foundation of a successful bathroom tile installation is a properly prepared wall. Ensuring the wall is clean, stable, and moisture-free is paramount for the tiles to adhere correctly and for the installation to withstand the test of time. Start by thoroughly cleaning the wall to remove any debris, dust, or old paint.
For new constructions, allow the wall to cure completely before commencing the tile work.
Selecting the Proper Adhesive
The choice of adhesive is crucial for securing the pebble tiles in place, especially in an outdoor setting. Opt for a durable, waterproof thin-set mortar that’s formulated for exterior applications to combat the elements, whether it’s the intense heat or the cold snaps. Adhering to the manufacturer’s guidelines for application will ensure the best results.
Layout Planning
Before affixing the tiles to the wall, take a moment to lay them out on the ground. This step is invaluable for envisioning the final look and for making any necessary adjustments to the arrangement or tile cuts. Use this opportunity to trim tiles to size, keeping in mind that a tile cutter or wet saw will give you the cleanest edges.
Tile Installation
With your design in place and the wall primed, you’re ready to begin the installation. Apply the mortar to small sections of the wall with a notched trowel to avoid premature drying. Position the pebble tiles onto the mortar, pressing them in firmly to ensure they’re evenly aligned and flush against the wall. A rubber mallet can be handy for tapping the tiles gently, and securing them into the mortar.
Regular Care
Maintaining the pristine condition of your pebble tile wall involves routine cleaning with gentle soap and periodic resealing to refresh its protective layer.
End Note
Embarking on the installation of pebble tiles on an exterior wall can dramatically transform your home’s aesthetic, adding a layer of texture and natural elegance. With meticulous preparation, appropriate materials, and a touch of patience, you can craft an exterior that’s not only beautiful but durable.
Embrace each step with care, and you’ll be rewarded with a façade that’s a testament to your craftsmanship and the timeless appeal of natural elements.